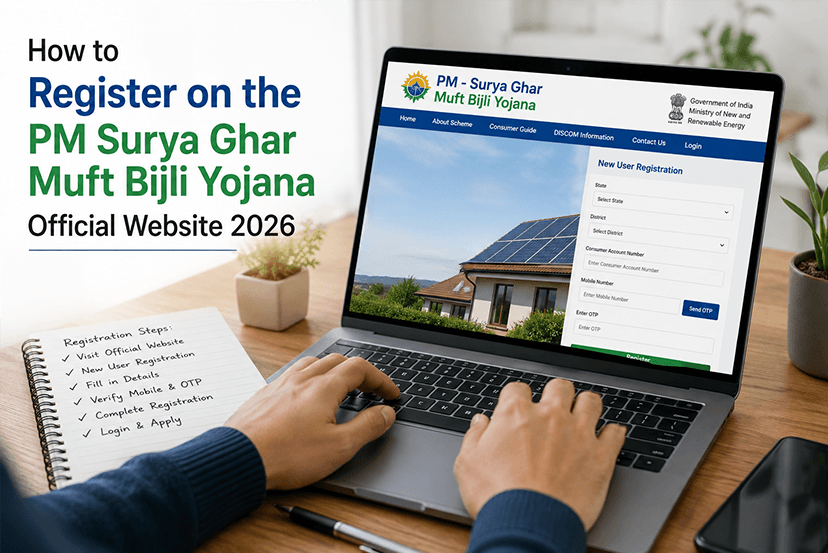
One of the initiatives of the Government of India is PM Surya Ghar Muft Bijli Yojana, that aimed to expand rooftop solar adoption among residential electricity consumers. The scheme provides Central Financial Assistance (CFA) for eligible residential rooftop solar installations, with the subsidy amount going up to Rs. 78,000 for systems of 3 kW and above, subject to scheme guidelines.
For consumers, the process is primarily managed through the National Portal, where applicants can register, apply for rooftop solar, select a registered vendor, track installation-related activities and complete the steps required for subsidy disbursement. Vendors also have a separate portal for registration and related activities. Understanding the entire scheme and tender process will make everything easier for you.
What Is PM Surya Ghar Muft Bijli Yojana?
PM Surya Ghar Muft Bijli Yojana is a rooftop solar programme that is designed to encourage households to install grid connected rooftop solar systems.
The purpose of this scheme is to help residential consumers reduce the dependence on grid electricity, lower electricity bills and generate clean power from their rooftops.
The Central Financial Assistance for residential consumer is structured at Rs. 30,000 per kW for the first 2 kW and Rs. 18,000 per kW for additional capacity up to 3 kW. Therefore, the maximum central subsidy for a residential installation is Rs. 78,000.
PM Surya Ghar Muft Bijli Yojana Official Website: PM Surya Ghar
Who Can Apply for PM Surya Ghar Muft Bijli Yojana?
The scheme is primarily intended for residential electricity consumers installing eligible grid-connected rooftop solar systems. The application and subsidy process involves the consumer, registered rooftop solar vendor and concerned DISCOM.
How to Register on PM Surya Ghar Muft Bijli Yojana Online?
Here are the steps to follow to register on the official PM Surya Ghar Muft Bijli Yojana –
STEP 1: Go to the official website: PM Surya Ghar
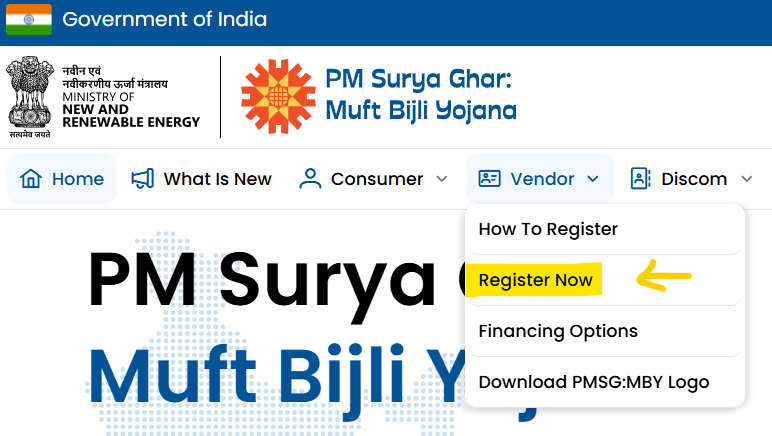
STEP 2: If you want to register for the PM Surya Ghar Muft Bijli Yojana, then you need to click on the “Vendor” section and in the section you will see the “Register Now” option.
However, if you wish to understand the process through government guidelines, then you can prefer reading the guide on “How to Register.” as shown in the below attached screenshot.
STEP 3: Now, you will be directed to another page where you need to provide the details, including:
- PAN Details
- Company Details
- Confirm Details
- Company type (proprietorship, partnership, LLP, private, public or other)
- PAN Number
- Upload PAN file
Also, the registration site shows “Disclaimer: CPSUs are exempted from the submission of Bank Guarantee”
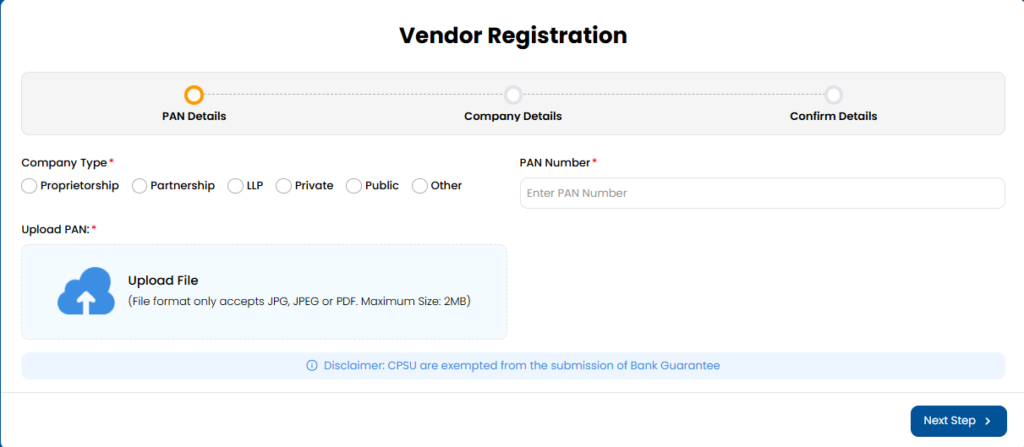
STEP 4: Once you have completed all these details you can go through the further process to successfully registered as Vendor.
How to Login to PM Surya Ghar Muft Bijli Yojana as a Consumer?
If you are a consumer who wants to log in to the PM Surya Ghar Muft Bijli Scheme, here are the steps to follow-
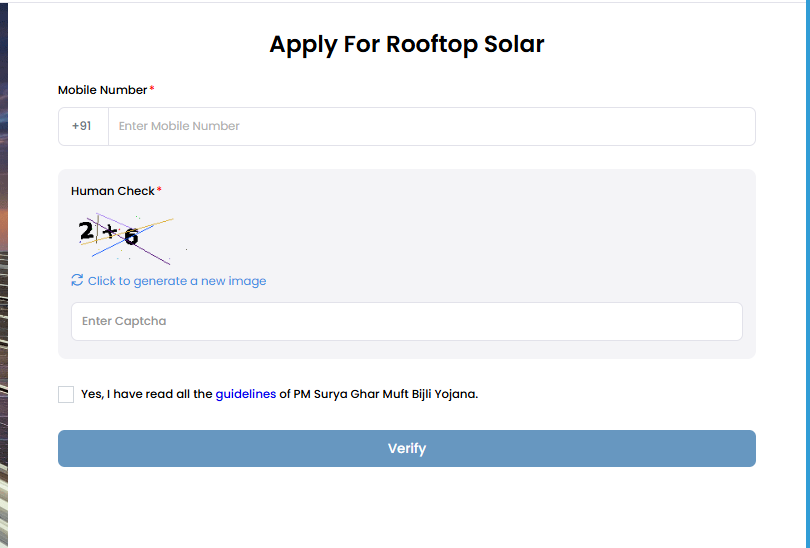
STEP 1: Visit the official portal and click on “Login.” where drop down option shows “Consumer Login,” click on that.
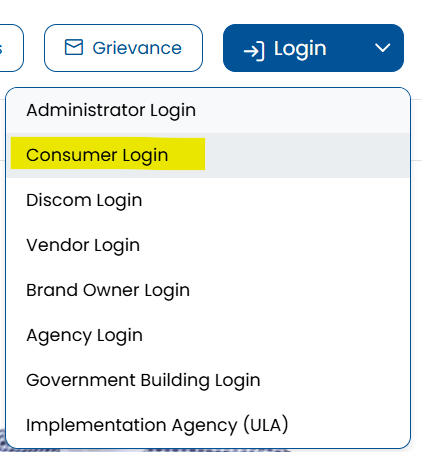
STEP 2: Now, you can apply for Rooftop Solar by providing your “Mobile Number” and entering the Captcha for verification.
What Can Consumers Do After Login?
After having an access to the consumer account, you can manage-
- Different stages of your rooftop solar application.
- Based on your current portal workflow, this can handle application related information, vendor selection, installation details, status tracking and documentation.
NOTE: Selecting a vendor does not mean the vendor becomes the owner of the application. The consumer retains access to the application and can perform relevant activities through the National Portal.
How to Apply for PM Surya Ghar Muft Bijli Yojana Online?
By following the steps, you can apply for PM Surya Ghar Muft Bijli Yojana-
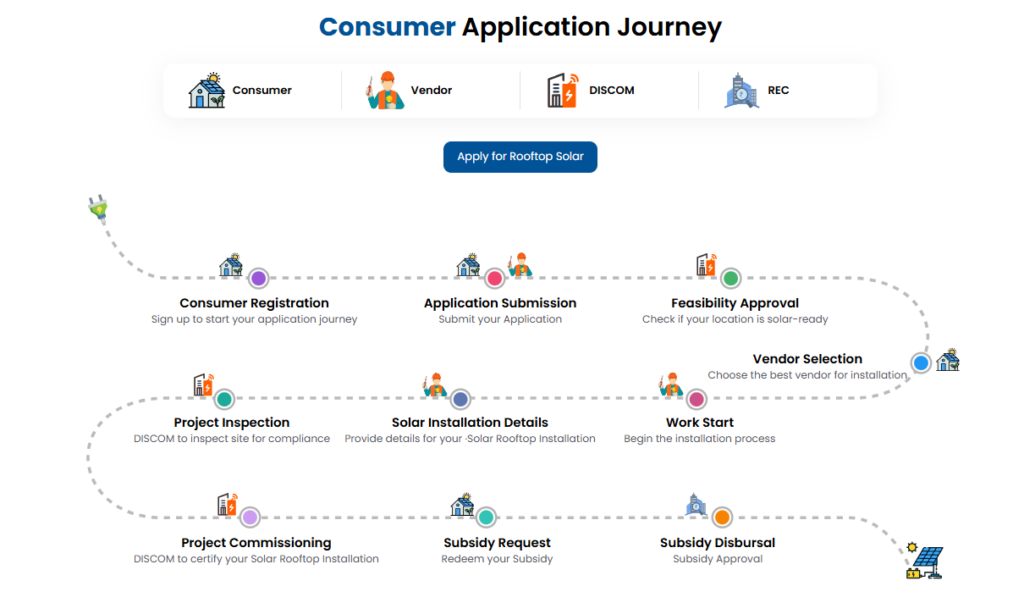
Step 1: Visit the Official Portal
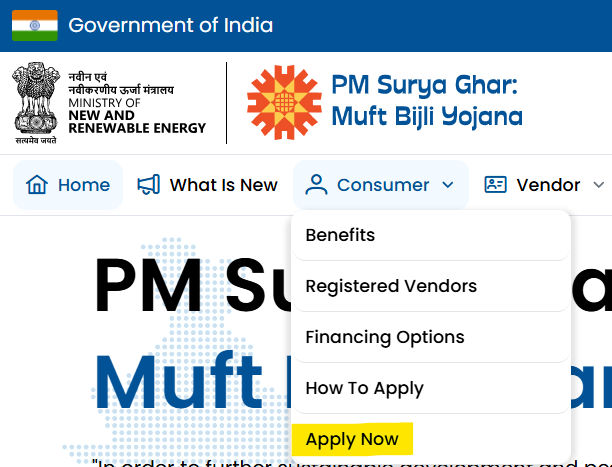
Go to the official portal and click on “Consumer,” where you can see the options, click on “Apply Now.”
Step 2: Complete Consumer Registration
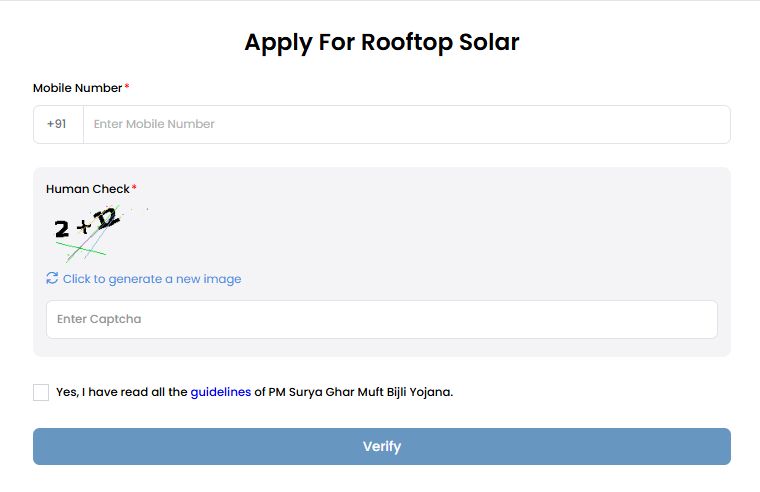
Enter the details for rooftop solar including “Mobile Number” and verify it using the CAPTCHA.”
Step 3: Submit the Rooftop Solar Application
After registration, submit the rooftop solar application by providing the required electricity connection and applicant details. The application is associated with the relevant DISCOM for subsequent processing.
Step 4: Select a Registered Vendor
After the application stage, the consumer can select an eligible registered rooftop solar vendor available through the portal. The vendor will assist with system design, installation and other activities required for commissioning.
It is advisable to compare vendors on factors such as system specifications, equipment quality, warranty, installation standards, after-sales service and overall quoted cost rather than selecting a vendor only on price.
Step 5: Installation of the Solar System
Once the required approvals and arrangements are completed, the selected vendor installs the rooftop solar system according to the applicable technical requirements.
The installation should use eligible components and follow the requirements applicable under the scheme and the concerned DISCOM.
Step 6: DISCOM Inspection and Related Process
After installation, the concerned DISCOM carries out the required verification and inspection. Further steps, including meter-related work and commissioning, depend on the applicable DISCOM process.
The subsidy is not simply paid immediately after submitting the application. Installation, verification and other prescribed requirements have to be completed before the CFA is processed.
Step 7: Subsidy Processing
Once the installation and verification requirements are completed, the application proceeds for subsidy/CFA processing according to the applicable scheme procedure.
This is why applicants should carefully monitor their application status and respond promptly if the portal or DISCOM requests additional information or action.
The entire process looks like this-
Moreover, for those looking to track government tenders related to solar projects, procurement and other government opportunities, platforms such as TenderShark can also help in finding and monitoring relevant tenders in one place.
What Is the Difference Between Consumer Login and Vendor Login?
The two logins serve different purposes.
| Feature | Consumer Login | Vendor Login |
| Intended for | Residential electricity consumers | Eligible rooftop solar vendors |
| Main purpose | Apply for rooftop solar and manage application | Register and participate as a scheme vendor |
| Registration | Consumer registration | Vendor registration and verification |
| Vendor selection | Consumer selects a registered vendor | Vendor becomes available for eligible consumers after approval |
| Application management | Consumer can access relevant application activities | Vendor handles assigned installation-related activities |
Understanding this difference is important because searching for the wrong login can lead users to unrelated pages or unofficial websites.
How Much Subsidy Is Available Under PM Surya Ghar?
For eligible residential rooftop solar installations, the central subsidy is structured as follows:
| Rooftop Solar Capacity | Central Financial Assistance |
| Up to 1 kW | ₹30,000 |
| 2 kW | ₹60,000 |
| 3 kW | ₹78,000 |
| Above 3 kW | Maximum ₹78,000 |
The calculation is ₹30,000 per kW for the first 2 kW and ₹18,000 for the additional capacity up to 3 kW. For systems above 3 kW, the total central subsidy remains capped at ₹78,000.
Consumers should also check whether their state or UT provides any additional support and whether separate conditions apply. The scheme framework allows states/UTs to supplement the central assistance, subject to applicable guidelines.
How Long Does the PM Surya Ghar Application Process Take?
There is no single fixed timeline that applies identically to every application because several parties can be involved, including the consumer, vendor and DISCOM.
The overall process can depend on application verification, technical feasibility, vendor scheduling, installation, inspection, net-meter-related activities and completion of required documentation.
Therefore, if an application appears to be taking longer than expected, the best approach is to check its status on the portal first and contact the concerned DISCOM or designated support channel if an action is pending.
The scheme guidelines also provide mechanisms for tracking and triggering delays related to DISCOM inspection and net-meter installation.
Frequently Asked Questions
Q. Where can I find PM Surya Ghar Muft Bijli Yojana vendor login?
Ans. Vendors can use the official vendor portal at vendor.pmsuryaghar.gov.in for vendor registration and related activities.
Q. How can I apply for PM Surya Ghar Muft Bijli Yojana online?
Ans. Visit the official National Portal, complete consumer registration, submit the rooftop solar application, select a registered vendor and complete the installation and DISCOM verification process. Subsidy processing follows the completion of the required stages.
Q. What is the maximum subsidy under PM Surya Ghar?
Ans. The maximum Central Financial Assistance for an eligible residential rooftop solar installation is ₹78,000 under the applicable subsidy structure.
Q. Can I choose my own solar vendor?
Ans. Consumers can select a registered rooftop solar vendor through the National Portal. The scheme framework allows consumers to enter into arrangements with vendors at mutually agreed rates, subject to the applicable scheme requirements.
Q. Is consumer registration and vendor registration the same?
Ans. No. Consumer registration is intended for households applying for rooftop solar, while vendor registration is for solar companies participating as registered vendors under the scheme.
Final Words
The PM Surya Ghar Muft Bijli Yojana makes the rooftop solar application process more structured by bringing consumer registration, vendor selection, installation-related activities and subsidy processing onto a centralised digital platform. For consumers, the most important step is to start from the official portal, enter accurate electricity connection details, select a registered vendor and keep track of the application until installation and DISCOM verification are completed.